When I go out and gather my reference pictures I usually take a number of photos of the same area so that I can get variation, however one high res image will usually do.
I have gathered a number of suitable textures already and they are freely available from my flickr site:
http://www.flickr.com/photos/46897232@N04/
I will be using the small stone floor texture. (see link below)
http://www.flickr.com/photos/46897232@N04/4571961761/sizes/o/
Save this image in a folder on your local drive.
I often make a workspace folder for each terrain texture so that the source files and finished ACE files are kept together till I am finished and they are ready to go in game.
For this I will not be using photoshop but will be using Gimp which is free to download, a quick internet search will find it.
Load up Gimp and open the photo you just saved. Our textures need to be 256/256 pixels in size and at the current resolution the image is not right.
Scale photo
In the tool bar click on Image and then scale image, in the new window reduce image size to 1000 pixels in width and 667 pixels in height, then click the scale button.
Your iamge will shrink on screen too, however you can use the magnifying glass to zoom in which is in the tools window on the left. As you can seen the image is not as crisp as it once was.
Sharpen Image
In the top tool bar click on Filter/Enhance/Sharpen
Move the slider till it is between 30 or 40 and click ok.
Safe image as a TGA file
On the top tool bar click File/Save as and type in Stone_Source01.tga
Another small window pops up about BLE compression, just click the save button without changing any settings.
creating your red,blue,green and yellow source textures
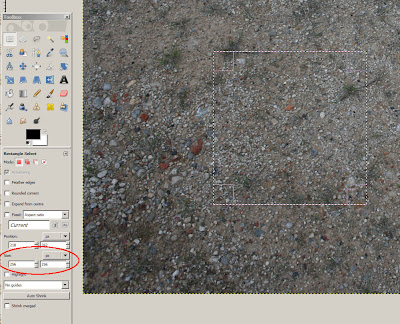
In the toolbox on the left click on the retangle selection tool and draw a box on your image.
We need that image to be 256/256 exactly so type in 256 in the selection box in the lower part of the toolbox.

Now move your selection box around the texture till you have an area that is suitable.
Please note that the aim is to have a texture that is detailed but lacks any large features that would show up once tiled.
Once you have found a suitable area click on Edit/Copy from the top tool bar, then click on File/new on top tool bar.
Type in 256 in the Width and height boxes and click ok.
This opens up a new image. (with it's own top tool bar) Click on the new top tool bar and click Edit/Paste.
Click on File/Save as and type in Red.tga Click on the flatten layers and click save.
Making the texture Tile
We now have an image that needs to tile to work.
Click on Layer/Transform/Offset from the top tool bar, type in 128 in the x and y boxes then click offset.
Now you have a texture that has the edges crossing in the middle of the texure. The good news is your texure will now tile along it's edges. We just need to remove the straight edges from the middle.
Clone brush
The clone brush is a wonderful tool that allows you to select an area of an image and paint it other another area.
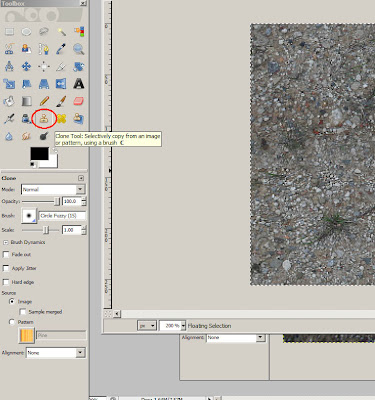
Click on the clone tool (see image), select a fuzzy brush and make sure your brush is not to big or small, (15 pixels is about right)

Hold Ctrl down and select an area on your texture. This layers a marker where you will start your clone. Then paint over an area where you can see the square edge.
After you have painted a few details out, hold Ctrl down again and select another area of your texure and paint another straigh edge out. This keeps the area looking natural and random.
Do this till you can not see any straight lines, Click Save.

You now have one of your 4 textures, do the same for Green/yellow and blue textures.
For each one pick a new 256/256 area from your source texture.
While it may feel a little long winded, once you have got upto speed each image should only take a minute or so to make.
Next in PART 3: creating the final 8 textures.
What does Wang mean?
ReplyDeleteIngnore that comment, I just read the first post in this article
ReplyDelete