Tuesday, 3 November 2009

Shaders and kuju materials - WaterCubemap.fx

In Railworks there are a number of ways of creating water assets in your route.

(1) Rivers - Here a river loft is recommended. This asset would use the WaterCubeMap.fx

(2) Lakes and Seas - The in-game (editor mode) water decal is recommended as it is the most efficient way to create a large expanse of water.

(3) Scenery - Sometimes a very small localised water effect is required on a scenery asset that is irregular in shape. In this case, the WaterScenery.fx shader can be used.

Using the WaterScenery.fx shader, the author can create a scenery asset and assign the WaterScenery.fx to any polygon. Therefore the shape of the water surface is under the control of the author. This asset can be exported as usual via a the IGS format and be referenced in a 'Scenery Blueprint'.

Example Use
Water troughs, swimming pools, circular ponds, open water towers etc.
Points of Interest
This is a vertex shader (meaning the positions of the vertices of the surface are physically moved) is therefore expensive to render. It is therefore recommended to keep its use down to a minimum.

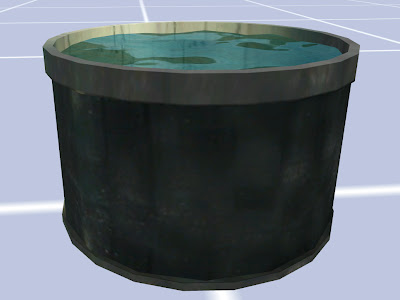
Notice that the surface of the water shown below is no longer flat as seen in the other water shaders.


As can be seen below, the shader is a triple pass shader with 3 texture slots. All texture slots MUST contain a reference to a texture. In slot 1, we specify the normal map texture, along with the five UV arguments and specular value. In both slots 2 and 3 we specify the texture for the water surface.


The following UV arguments should be setup for slot 1 of the shader.

UV argument 1 : Specular component (values between 0 and 64)
UV argument 2 : 'Wobble' factor (values between 0 and 1)
UV argument 3 : Movement speed (0.02 is a good value)
UV argument 4 : Oscillation height (0.02 is a good value)
UV argument 5 : Oscillation scale (6 is a good value)

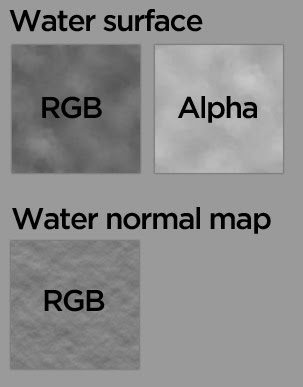
Below are example textures showing the alpha channels where applicable.
Shaders and kuju materials - TrainGlass.fx

The TrainGlass.fx shader in RailWorks should be used whenever a translucent glass material is required. e.g. Windows on rolling stock.

Using the glass shader the author can control the following properties:
(a)Texture - Whats on the glass, colour, scratches etc
(b)Translucency - How see-through the glass is
(c)Specular - The size of the 'shiny' highlight phong
(d)Environment Map - The intensity of the environment map (the faked reflection) in both day and night lighting conditions.

Example Use:
Windows on Rolling Stock
Point of Interest:
Only a single texture needs to be created by the author, even though there are two texture slots in this material. Both texture slots MUST contain a texture reference. The same texture can be referenced (or pointed to) in both texture slots. This second texture slot simply exists to allow the game code to carry out a second environment pass (fake reflection map) in the game.

Here we have the TrainGlass.fx shader applied to 3 assets (A,B and C), all using different parameters.

TrainGlass.fx shader viewed in the daytime.


TrainGlass.fx shader viewed in the nighttime.


Here we have the 3 materials used for the assets A, B and C. All use the same shader (TrainGlass.fx) but use different parameters. The parameters are highlighted below.


The important parameters are the UV arguments (for Slot 1 only), and the Specular Power.

UV argument 1 : This specifies the 'tightness' of the phong highlight. Keep this value somewhere between 0-64 with 64 being the 'tightest'.

UV argument 2 : This specifies the intensity of the reflection (day-time)

UV argument 3 : This specifies the intensity of the reflection (night-time).

Specular Power : This specifies how brightness (or intensity) of the phong highlight. Keep this between 0-8 with 8 being brightest.

Example texture (used for the examples above) showing RGB and intensity of alpha channel.